There are few cookies as universally beloved, nostalgically cherished, and utterly delicious as the peanut butter blossom. With its soft, chewy peanut butter base and iconic chocolate kiss nestled in the center, it's a treat that evokes warmth, comfort, and the joy of home baking. While their appearance on holiday cookie trays is practically mandatory, these delightful bites are far more versatile, gracing everything from school bake sales to elegant wedding receptions. Mastering these seemingly simple cookies isn't just about following a recipe; it's about understanding the subtle nuances that elevate them from good to truly perfect. This comprehensive guide will walk you through every step, ensuring your peanut butter blossoms are soft, tender, and irresistible every single time.
The Timeless Appeal of Peanut Butter Blossoms
For generations, peanut butter blossoms have held a special place in culinary hearts. Their origin story, often attributed to Freda Smith who popularized them, speaks to their enduring appeal. They aren't just cookies; they're edible symbols of tradition, community, and celebration. Consider, for instance, the legendary cookie tables found at Pittsburgh wedding receptions – lavish spreads laden with dozens of homemade, old-fashioned offerings. Amidst lady locks, pizzelles, and buckeyes, peanut butter blossoms consistently shine, a testament to their widespread adoration. Family members, sometimes weeks or months in advance, dedicate themselves to baking and freezing these treats, highlighting the value placed on homemade goodness.
What makes these peanut butter and chocolate cookies so incredibly captivating? It boils down to a few irresistible factors:
- Effortless Charm: They are undeniably cute, their golden, sugar-coated exterior crowned with a gleaming chocolate peak. This visual appeal is a huge part of their allure.
- The Dynamic Duo: The combination of rich, savory peanut butter and sweet, melting chocolate is a classic for a reason. It's a flavor pairing that satisfies on multiple levels, offering a perfect balance of salty and sweet.
- Uncomplicated Joy: Despite their impressive appearance, peanut butter blossoms are remarkably easy to make. This accessibility makes them a go-to for busy bakers, especially during the hectic holiday season when time is often at a premium.
- Sensational Texture: A truly great peanut butter blossom boasts a wonderfully soft and chewy texture. They melt in your mouth, delivering a mighty peanut butter punch that keeps everyone coming back for more.
It's these qualities that transform a simple cookie into a cherished memory, a taste of tradition, and a guaranteed crowd-pleaser. They embody the spirit of homemade treats, making them a staple in kitchens worldwide.
Crafting the Perfect Peanut Butter Blossom: Step-by-Step Mastery
Achieving that perfect, soft-baked peanut butter blossom isn't difficult, but it does benefit from understanding the "why" behind each step. Let's break down the process to ensure flawless results.
Gathering Your Ingredients: The Foundation of Flavor
While the ingredient list for peanut butter blossoms is fairly standard, the quality of one particular item can make a significant difference: peanut butter. Many seasoned bakers swear by using all-natural peanut butter for this recipe. Unlike highly processed versions, natural peanut butter often has a more intense, authentic peanut flavor that truly shines through in the cookie. Ensure it’s a creamy variety, not chunky, unless you prefer a different texture. Beyond that, you’ll need typical baking staples: flour, baking soda, salt, butter, granulated sugar, brown sugar, eggs, vanilla extract, and, of course, the iconic chocolate kiss candies. Having everything measured and ready before you begin will streamline your baking process.
Mixing the Dough: Aim for Softness
The journey to a perfect peanut butter blossom begins with creating the right dough. You'll typically start by creaming together the wet ingredients – softened butter, granulated sugar, and brown sugar – until light and fluffy. This aeration is crucial for the cookie's texture. Then, beat in the egg and vanilla extract, followed by the star ingredient: peanut butter. In a separate bowl, whisk together your dry ingredients (flour, baking soda, and salt) before gradually incorporating them into the wet mixture. The key here is to mix until *just* combined; overmixing can lead to tough cookies. Expect a very soft cookie dough – this is intentional and contributes to the final soft, chewy texture. Don't be alarmed if it seems a bit too pliable; the next step will address this.
The Essential Chill: Don't Skip This Step!
Perhaps the most crucial step often overlooked by novice bakers is chilling the dough. After mixing, your soft dough needs time to solidify. Transfer the dough to an airtight container or wrap it tightly in plastic wrap and refrigerate it for at least 1 hour. This isn't just a suggestion; it’s a game-changer. Cold dough:
- Holds its Shape: It prevents the cookies from spreading excessively in the oven, ensuring they maintain their classic domed shape.
- Easier to Handle: Chilled dough is far less sticky and much easier to portion and roll into neat balls.
- Develops Flavor: While less critical than for other cookies, chilling can subtly enhance the flavors by allowing the ingredients to meld.
If you're short on time, even 30 minutes can help, but aim for the full hour or more for optimal results. You can even chill the dough overnight if preparing ahead.
Roll and Sugar-Coat: The Signature Look
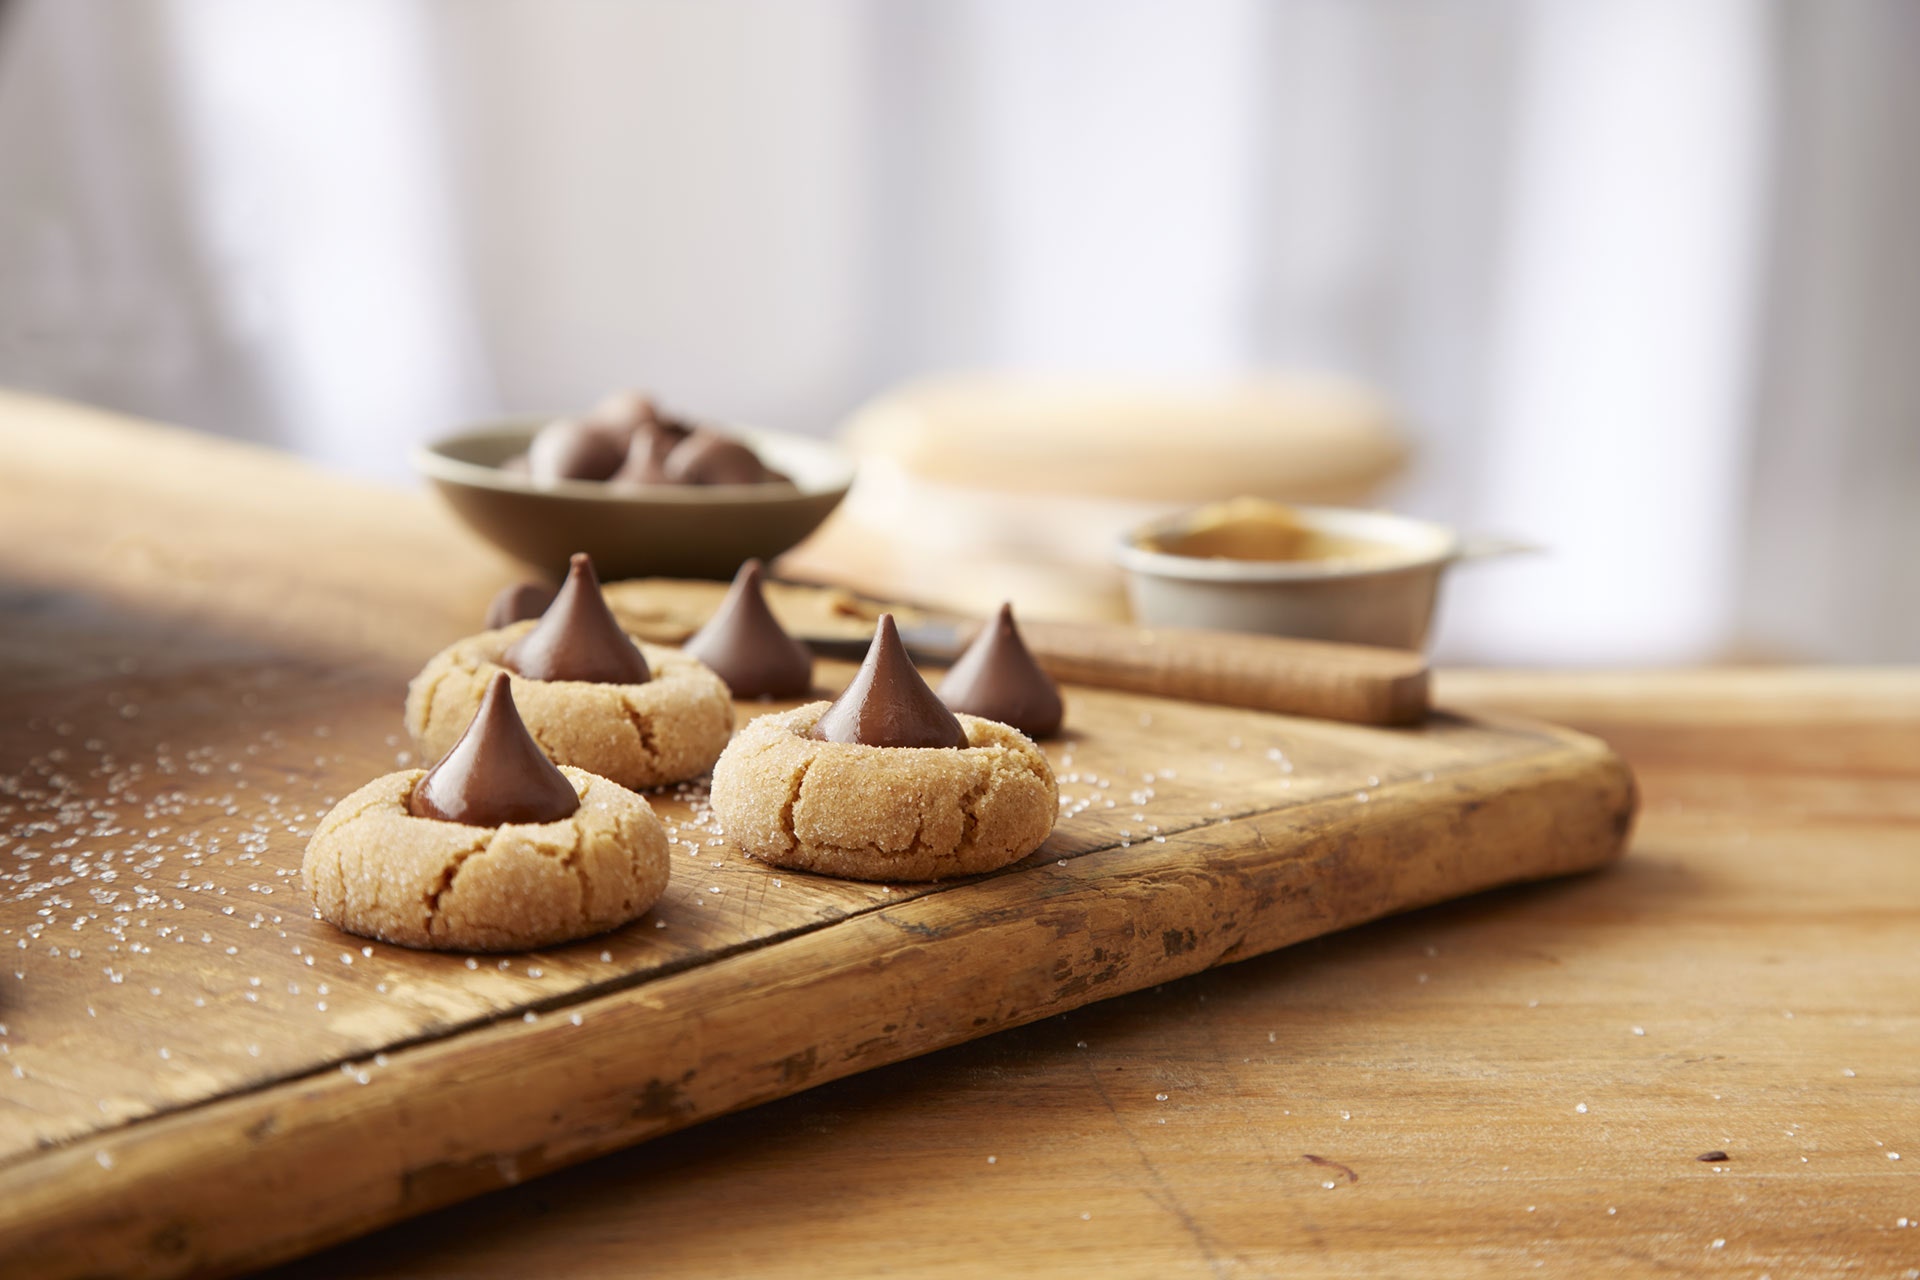
Once your dough is perfectly chilled, it's time to create the individual cookie balls. Scoop out about 1 heaping tablespoon of dough for each cookie. Gently roll it between your palms to form a smooth sphere. The next step is iconic: roll each dough ball generously in granulated sugar or sanding sugar sprinkles. This sugar coating serves multiple purposes:
- It adds a delightful sparkle and visual appeal.
- It provides a pleasant textural contrast to the soft interior.
- It helps prevent the cookies from sticking to the baking sheet.
Arrange your sugar-coated dough balls on a baking sheet lined with parchment paper or a silicone baking mat, leaving adequate space between them for spreading.
Baking to Perfection: The Right Timing
Bake your peanut butter blossoms in a preheated oven until they are just set around the edges but still appear soft in the center. The exact baking time will vary depending on your oven, but typically it's around 8-12 minutes. The cookies will puff up and then flatten slightly, developing a delicate crackled surface. It's crucial not to overbake them if you want to achieve that coveted soft and chewy texture. They might still look slightly underdone when you pull them out – this is perfect!
The Iconic Chocolate Kiss: Timing is Everything
This is the moment of transformation! As soon as the cookies come out of the oven, while they are still hot and pliable, gently press a chocolate kiss into the center of each one. The residual heat from the cookie will slightly melt the chocolate, allowing it to adhere perfectly and create that signature gooey center. Don't press too hard, just enough to embed the kiss. Let the cookies cool on the baking sheet for about 5 minutes before carefully transferring them to a wire rack to cool completely. This initial cooling on the hot sheet helps them set without falling apart, and the wire rack ensures air circulation for even cooling, preventing a soggy bottom and allowing the chocolate to fully set without smearing.
Troubleshooting & Expert Tips for Blossom Bliss
Even seasoned bakers encounter hiccups. Here are some common issues and advanced tips to ensure your peanut butter blossoms are always a resounding success.
My Kisses Are Melting Too Much!
If your chocolate kisses are completely melting into a puddle, it could be a couple of things. First, ensure your chocolate kisses are at room temperature, not cold from the fridge, as extreme temperature differences can cause them to melt too rapidly. Second, you can wait about 1-2 minutes after removing the cookies from the oven before pressing the kisses. This allows the cookie to cool slightly, reducing the immediate melting, but still leaving enough residual heat to soften and adhere the chocolate beautifully.
Preventing Flat Cookies
Flat cookies are often a result of warm dough. Always ensure your dough is adequately chilled for at least an hour. Additionally, confirm your baking soda is fresh and active. Old leavening agents lose their potency, affecting the cookie's rise. Using room-temperature butter that's properly softened (not melted) also ensures optimal aeration when creaming, contributing to a better structure. Over-greasing your baking sheet can also cause spreading; parchment paper or silicone mats are preferable.
Storage and Shelf Life
Once completely cooled, store your peanut butter blossoms in an airtight container at room temperature. They will remain wonderfully soft and delicious for up to 5 days, making them perfect for make-ahead baking. Keep them out of direct sunlight to prevent the chocolate from melting. For longer storage, peanut butter blossoms freeze exceptionally well. Place cooled cookies in a single layer on a baking sheet and freeze until solid, then transfer them to a freezer-safe bag or container for up to 3 months. Thaw at room temperature before serving.
Variations and Customizations
While the classic peanut butter blossom is perfect, don't hesitate to experiment!
- Chocolate Alternatives: Instead of traditional milk chocolate kisses, try dark chocolate, white chocolate, or even miniature peanut butter cups for an extra peanut-y punch.
- Sprinkle Fun: Beyond granulated sugar, experiment with colored sanding sugars for different holiday themes or even a mix of sprinkles before baking for added festivity.
- Nut Butter Swaps: For those with other nut butter preferences or allergies, almond butter or cashew butter can be substituted, though the flavor profile will, of course, change.
Why These Easy Peanut Butter Blossoms Are Everyone's Favorite Treat
In a world full of complex desserts, the easy peanut butter blossoms stand out for their simplicity, undeniable charm, and exceptional flavor. They represent the best of homemade baking: approachable, satisfying, and imbued with a sense of tradition. Whether you're a seasoned baker or just starting your culinary journey, these cookies offer a rewarding experience and a delicious outcome. Their perfect balance of sweet and salty, soft and chewy, combined with their adorable appearance, solidifies their status as a universally adored treat. They are, quite simply, joy in cookie form.
Mastering peanut butter blossoms is a delightful culinary skill that promises soft, perfect cookies every time. By paying attention to details like dough chilling, ingredient quality, and precise timing, you'll consistently bake a batch that's sure to impress and satisfy. So, gather your ingredients, preheat your oven, and prepare to fill your home with the irresistible aroma of these timeless, comforting treats.
